The Backups Speech
Every discussion about file backups generally revolves around the same paradigm:
You need to have 3 copies of your data: the production data, a local copy, and an off-site backup.
Similarly, when reading about home servers, there are lots of pieces of (good) advice that talk about the importance of redundancy at every level:
- ‘Fast and redundant storage, best results with SSD disks.’ - Proxmox Recommended Hardware
- ‘We do not recommend installing TrueNAS on a single disk or striped pool unless you have a good reason to do so.’ - TrueNas Minimum Hardware Requirements
But the reality of the situation is my laptop has one internal drive and I want more NAS storage as cheap as possible. This led me to research USB external storage.
My Setup
As mentioned in my homelab design post, my NAS is a late 2011 Macbook Pro, and even with my swapped-in SSD, I have only 2TB of storage on a single drive.
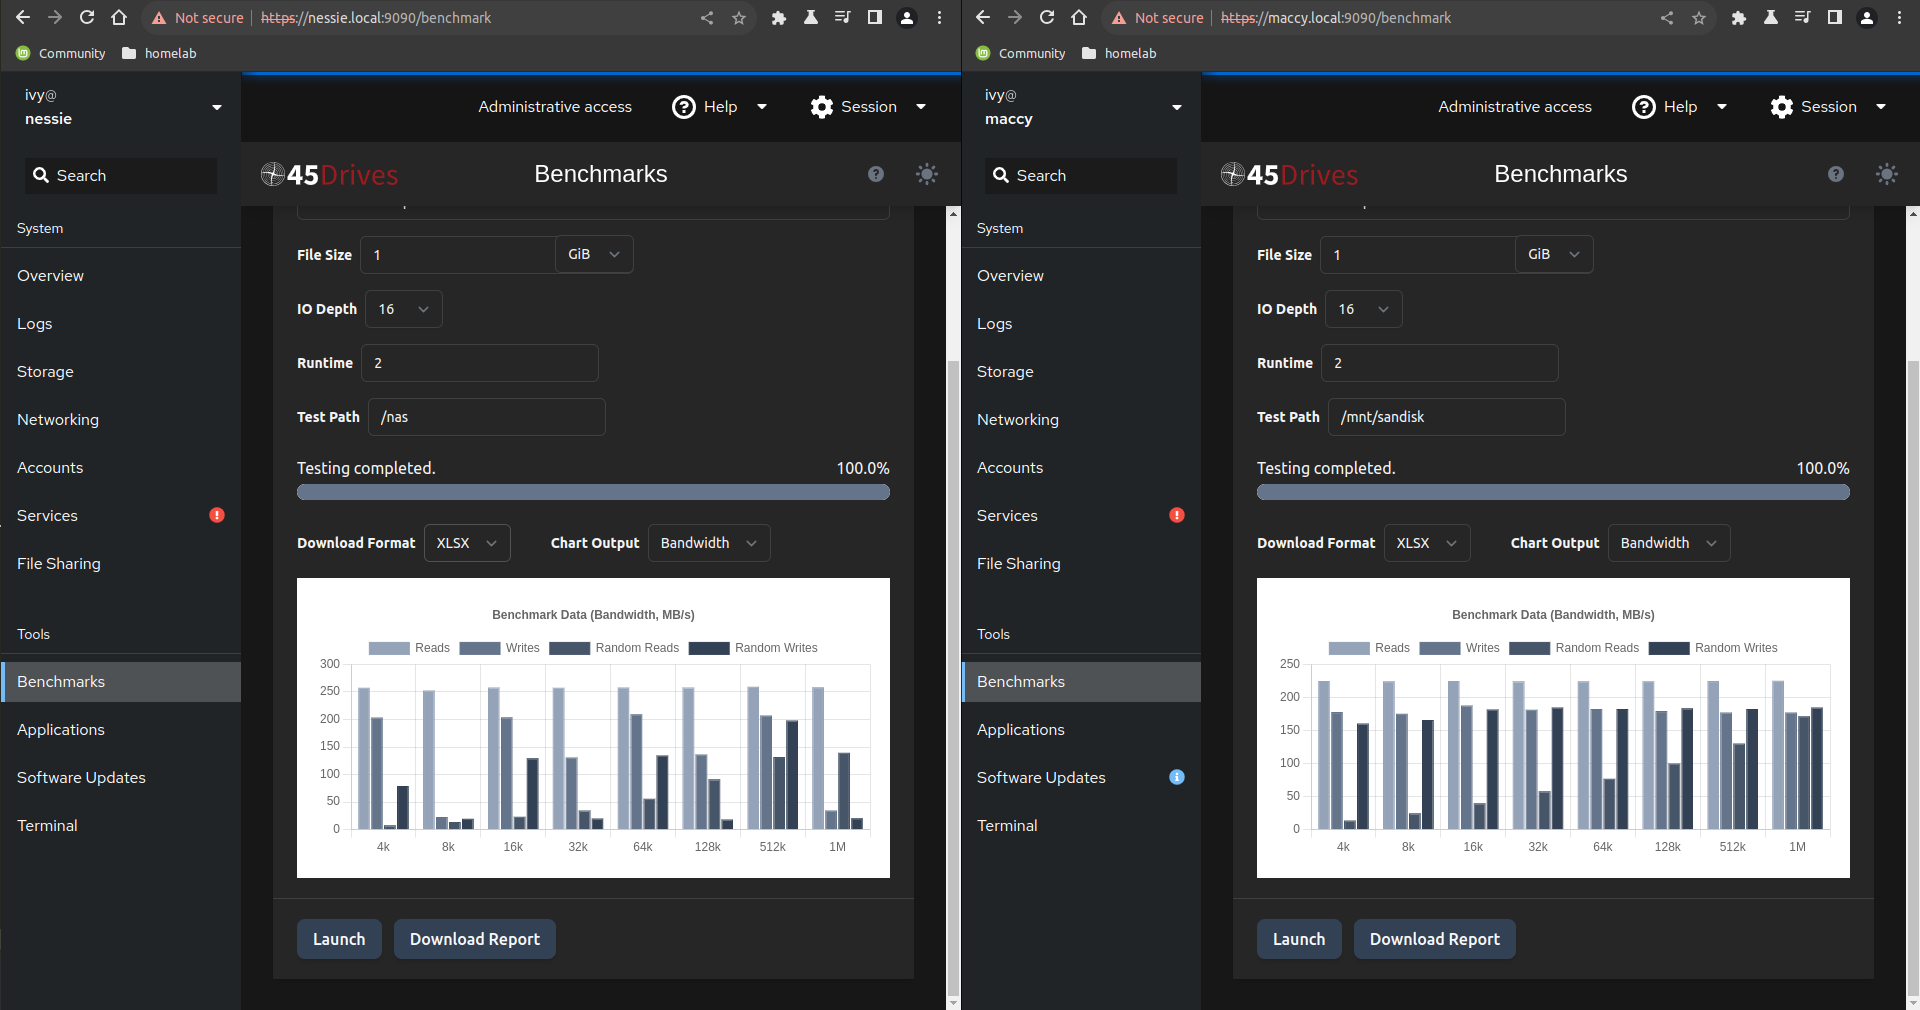
But, thats not my full homelab. I have recently configured another laptop as per my previous post for 2 hosts:
nessie: a 2011 Macbook Pro with an upgraded 2TB SATA SSDmaccy: a 2015 Macbook Pro with a 256GB not-easily-upgradable NVME SSD
2TB is not insignificant, but most NAS solutions put that size to shame. Since we’re using laptops, we don’t have much internal upgradability (if any), so let’s explore USB storage on NAS’s, and see when it makes sense.
Rule #1: Check Your Speed
Most questions online about ‘how do I use a USB drive on my NAS?’ end in the same answer: don’t even bother.
And for a long time, this was a reasonable (if curt) answer because USB was unbearably slow. Here’s a table showing file transfer times on all USB versions, SATA 3, and Gigabit ethernet:
| Version | Speed (Gbps)1 | Transfer Time 10GB2 | Transfer Time 100GB3 |
|---|---|---|---|
| USB 1.0 | 0.002 | 16 hours | 168 hours |
| USB 1.1 | 0.012 | 2 hours | 21 hours |
| USB 2.0 | 0.5 | 3 minutes | 0.5 hours |
| Ethernet | 1 | 1.5 minutes | 15 minutes |
| USB 3.0 | 5 | 17 seconds | 3 minutes |
| USB 3.1 | 10 | 8 seconds | 1.5 minutes |
| USB 3.2 | 20 | 4 seconds | 44 seconds |
| USB 4/TB3 | 40 | 2 seconds | 20 seconds |
| SATA 3 | 6 | 14 seconds | 2.5 minutes |
Before USB 3.0, USB storage was too slow for most applications. Even now, 5Gbps is not incredibly fast, but since an internal SATA 3 drive is around 6gbps, it is not as dreadful as it once seemed. Now, most servers don’t have high speed USB, but plenty of laptops do! maccy has USB 3.0, at 5gbps. However, since nessie only has USB 2.0, it is not viable.
So USB 3 is fast enough for me
The other issues with USB revolve around it’s resiliciency. System Admins will never recommend using external storage because it is a terrible idea for any business. God forbid a USB drive with the production database fails, or just gets unplugged when an intern gets caught on a cable!4
Critical data does not belong on a USB drive, but none of my data is really that critical. All of my development work is already hosted on github. My files are really just old schoolwork, pictures, and videos that I would like to keep safe, but don’t need 24/7/365 access with hardware redundancy. The best solution for me is just to run a USB drive and also backup remotely.
Rule #2: Don’t Fail to Boot
My homelab posts are the top 10% of the stuff I have tried, and USB drives have been fighting me for a long time. When designing a NAS with USB storage, remember that they will disconnect. It’s a ‘when, not if’ situation. Our implementation has to account for this and mitigate the issues that this can cause.
First off, the USB drive cannot be the boot drive. Booting off of USB is useful sometimes, but when you are already playing in the margins of tech, double dipping is a bad idea. If we allow our server to have a USB drive as a storage drive that is mounted later, we can gracefully deal with disconnections.
fstab, the file that lists how to mount all drives at boot, has a few options we need to enable. By default, most systems will either halt at boot or wait for a long timeout to pass before booting. If our USB storage is gone, we still want to be able to access the server’s web UI!5
With the cockpit UI that our system already has, all we really have to do is plug in the drive, format via the UI, and then work on our fstab options. There are many cool file systems, but I prefer to keep everything as simple as possible. One partition on the USB drive, ext4, no encryption. For nomenclature, I prefer for USB drives to be mounted at /mnt/<diskname>.
After basic configuration, our fstab line looks something like this:
UUID=f94b134d-4e14-4c05-8f30-19aaa477acb4 /mnt/sandisk auto defaults 0 0
We’ll add a nofail to this line, making it like this:
UUID=f94b134d-4e14-4c05-8f30-19aaa477acb4 /mnt/sandisk auto defaults,nofail 0 06
This option means that when booting, we will not fail to boot if we are unable to mount our external drive. There are other issues to deal with, but this is the main one that could break our entire deployment.
Rule #3: Offsite Backups
Another data backup quote I see bounce around often is ’local copies are not a replacement for remote backups’, which is true, but is focused again at a business environment.
If a production hard drive dies, you need a copy of those files, right now. Servers typically do this via data redundancy over RAID (or other software solutions) with a drive already connected. Switchover is instant, the database never goes down, the business never loses a client due to a service outtage.
Again, at home, I am the client and my server needs are not critical to my ability to put food on the table. For me, a remote backup is fine. The disaster I am trying to prevent is not ‘what happens if hardware fails during peak business’, but ‘my old laptop drive finally died’ or ‘my apartment flooded’. So, 1 local copy and remote backups are enough for me.
There are a myriad storage providers, and a myriad of backup solutions. Here is what I have found to work for my uses and be cost effective:
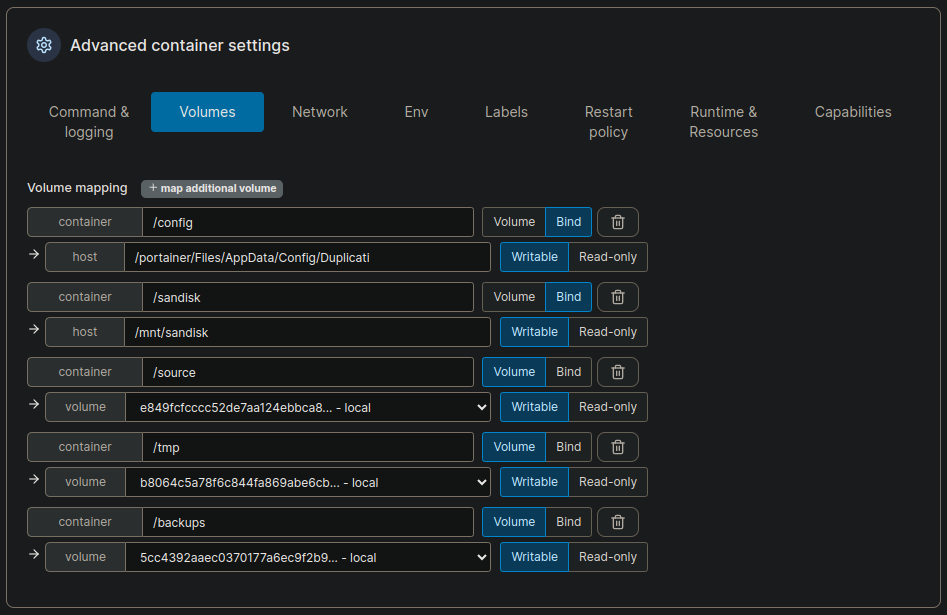
Duplicati running inside a Portainer template from this repo - This docker image then mounts our data directory (/mnt/sandisk/), allowing it to access the data directory.

Backblaze B2 for bulk storage. My original pick was AWS, but B2 is easier for deployments that don’t utilize the AWS/AIM/CLI ecosystem.7
Configuration tips:
-
I prefer to create a separate Application Key for each folder that my NAS uploads to B2. This way, each folder has its own configuration and is slightly more portable. Most of the backup software will upload files to the cloud provider in a binary format (not readable without the backup software itself).
-
Make sure each Application Key only has access to a single bucket. Always keep permissions as minimal as possible, its just a good security practice.
-
Encrypt your backups. It’s built-in to most backup software, so why risk it?
-
Check your backups! Backups that do not work are not backups at all. Restore a file, delete a file, modify a file, download a few gigabytes. Test, test, test!
Rule #4: Fail Gracefully
USB drives are going to fail, so we need to design our system to fail non-destructively. We’ve already started to account for this with our new mount options above, which allows our system to continue operating if the USB drive is not found during boot, but there are a few other considerations:
- Nothing Critical
- Our system is designed with the ability for our USB drive to fail, but our software implementation also depends on us continuing this assumption. Like we already keep our OS on the built-in drive, we should keep all of our programs, software, docker images, etc. on our built-in drive.
- The USB drive should only store data files & folders.
- Don’t Break Remote
- If our USB drive is not found, it is possible that some backup software could error out and assume that the files were deleted, thus causing a mess of our backups.
- Always test your implementation for this oversight. (Even if the backup software handles this situation properly, adding in our docker environment could lead to weird & undocumented behaviour.)
- I personally tested this on my duplicati/docker instance, and my deployment properly errors and stops the backup process when it cannot mount our data directory.
- Don’t Break Local
- Our backup system and our software design account for failure, so our last step is to fail gracefully as a NAS. Just like how we used specific
fstaboptions above, here are the important options for an NFS NAS (USB or not):
- Our backup system and our software design account for failure, so our last step is to fail gracefully as a NAS. Just like how we used specific
maccy.local:/mnt/sandisk /mnt/maccy/sandisk nfs rw,auto,nofail,noatime,nolock,intr,tcp,actimeo=1800 0 0
If we want to add more USB drives (such as for local backups), we can repeat the above proces, adding any number of /mnt/<driveName>’s as an NFS share via the Cockpit UI!
Rule #5: Don’t talk about USB Drive NAS’s
We have mitigated the downsides to USB drives, increased our homelab server storage and resiliency, and have a backup system for when the USB drives eventually break. Plus, we didn’t have to buy anything new! Our system fails gracefully in all of the situations covered above, and here’s how to fix pretty much every error condition I encountered during testing:
- Turn off the server.
- Replug the USB drive.
- Restart the server.
Being a fault-tolerant, slightly janky system is good for home use, but it is always worth doing it right when actual business is on the line. Please do not apply these to production deployments!
Footnotes
-
While file sizes are given in gigabytes, file transfer speeds are given in gigabits per second. https://en.wikipedia.org/wiki/Data-rate_units ↩︎
-
An hour of h.264 1080p video @ 24-30fps is ~ 10GB https://www.omnicalculator.com/other/video-size ↩︎
-
Calculations via https://techinternets.com/copy_calc ↩︎
-
If your production deployment relies on external drives to begin with, you may have problems that an internet blog post cannot solve. ↩︎
-
Since my laptops are also docker hosts, this would also mean all containers would be halted even if they did not interact with the external storage. ↩︎
-
Make sure to have the entire
defaults,nofailsection without any spaces. The spaces are what designate the columns in thefstabfile. ↩︎ -
AWS is very powerful, but with great power, comes great configuration. ↩︎