3D Printing 0-100
Impetus
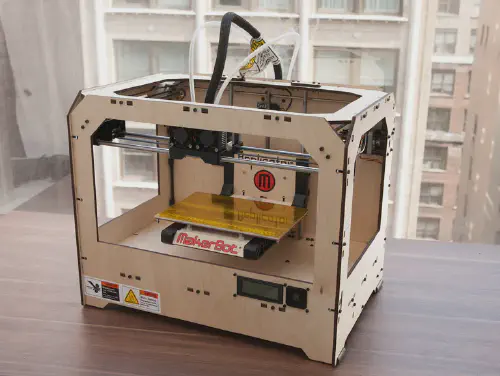
Okay so obviously 3d printing is not new. I’ve been aware of it for about 10 years or so, and I remember vividly seeing so many of these plywood boxes in every makerspace & home workshop in the Las Vegas tech scene:
The Problem with the King
3d printing is an incredibly hard problemspace to work in. Consider how often a 2d printer fails to work correctly, and then the idea of adding the third dimension clearly makes everything harder. So, with most new technology, it sucked…
If you wanted to 3d print in 2012 you needed:
- Lots of Money
- Lots of Time
- Lots of Effort
- Lots of Ibuprofen (for 3d printer induced headaches)
- Lots of Patience
And even then, results were not that great. Filament composition was poor, the software & firmware was a mess, and the idea of creating a coherent UI/UX flow was unheard of in the consumer space. So I ignored FDM printing for a while…
Consumerism Succeeds
Until Amazon showed me an Ender 3 v2 Neo for under 300$ shipped to my apartment in 2 days and I just bought it. Conspicuous consurism got me.
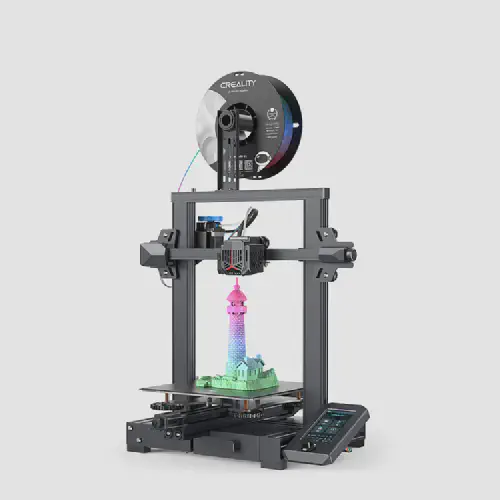
Why the Ender 3 v2 Neo? It had a few quality of life improvements over other Ender 3 priced printers:
- Quiet Motherboard, Power Supply, and Stepper Drivers
- PEI-coated, Removable bed
- Auto Bed Leveling
- Metal Bowden Gears
But most of all, it has a massive amount of aftermarket support, both for troubleshooting and upgrading (physical and software).
Technology versus UI/UX
Over the past decade, 3d printing technology and software has evolved massively. The remaining hurdles for normal people using 3d printers all revolve around the user experience flow. Here is the typical flow:
- Download model
- Open slicer software
- Process & slice (converting STL -> gcode, usually)
- Export gcode to sd card
- Bring sd card to printer
- Use a small lcd to select file to print
- Return in a few hours, usually with zero feedback on print progress/status unless you check the physical machine
- Pry print off the bed
Compare to a modern 2d printer flow:
- Download file
- Print dialog
- Remote print using CUPS/airprint
- Pick up print-out
Additionally, 2d printers don’t have to have their output area (i.e. printer tray) before printing again, but 3d printers (except in very rare cases) require human intervention between prints. So if you are researching a 3d printer, I’d advise that to really have a worthwhile tool, there is more than just the printer. The following is my guide to the various levels of rabbithole you can fall down.
What to Fix
The main issues with a stock Ender type systems are simple:
- Slow - Due to lots of engineering reasons, the physical max print speed of an Ender 3 is lower than other kinds. This is an inherent limit of the system, so we have to make the workflow around it as fast as possible to compensate.
- Dumb - There is no wifi connectivity, remote monitoring, or any kind of web interface. Only a physical screen and dials. This can be a pro or a con, as it allows you to add your own interface (I use octoprint, more info below). I would prefer my printer be dumb and off of my personal network, since I then have control over the entire monitoring system.
- Material Choice - Due to the hotend & bowden feed system, certain filament types are not feasible on a stock ender, such as many composites or flexible filaments. This is usually alleviated through large physical modifications to the print system, such as changing major components.
Level 1: Physical Basics
I specifically picked my printer because it came with a PEI magnetic steel bed. Basically, instead of scraping the plastic off a piece of glass, I take off a thin piece of steel, and flex it until the print comes off. The quality of life improvement is massive, but is also allows the use of multiple beds. For the first round of upgrades, I’d recommend the following:
- Extra print beds (allows swapping between prints, reducing downtime) - example
- A physical fire alarm to mount nearby - example
- Some simple printable upgrades
Level 2: Smarten up that Printer
Now here is where things get interesting! We’re going to add a single board computer running Octoprint. There are a lot of options for an octoprint host, such as
- Old Laptop/Desktop
- (Some) Android Phones
- Single Board Computers (or SBCs)
Hardware Selection
I’d recommend selecting an SBC if possible. While most of the octoprint configuration I’ve found useful so far has been entirely reproducable on the other systems, the easy ability to add sensors & switches (such as auto-on/off) is worth it. I ended up using a Raspberry Pi 3 Model B Plus Rev 1.3 because I had it on hand, but anything newer is also fine.
Webcam selection
On many SBC’s, there is often a CSI camera connector(s). These use this flat flex ribbon cable + Zero Force (ZF) connectors (quick tip: there are many other names ffor these cables/connectors):
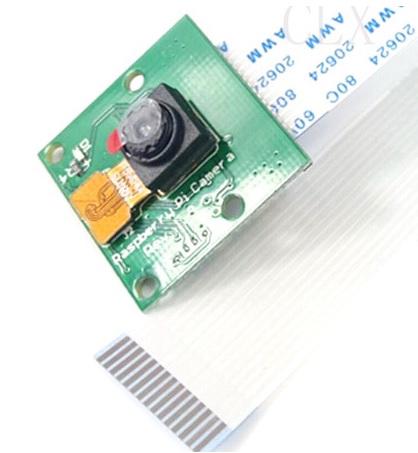
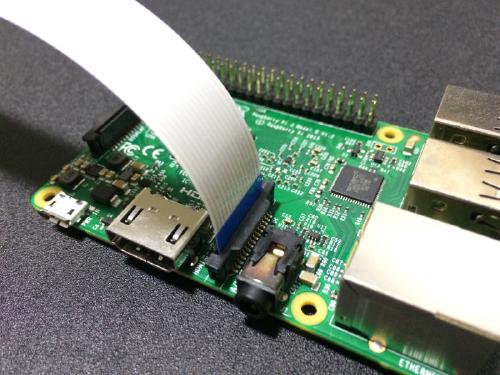
While these are useful and plentifulm, I would recommend a USB webcam over these if you don’t already have one or more. It is much easier to disconnect USB than a CSI connector, which can be a hassle when working on the printer.
Putting it Together
For my build, I ended up with the following 3d prints (after many other options as my setup has evolved & changed):
- RPI 3B Case
- RPI Cam Case for MMS
- MMS anchor for Ender aluminum extrusions
- MMS Axis Changer
- Modular Mounting System/MMS (GoPro compatible mounts)
Another classic octoprint gotcha - make sure to tape over the +5v pin on the USB cable from the SBC to the printer. Otherwise weird power things can occur. Kaptan tape or electrical tape are both solid options. See this great explanation.
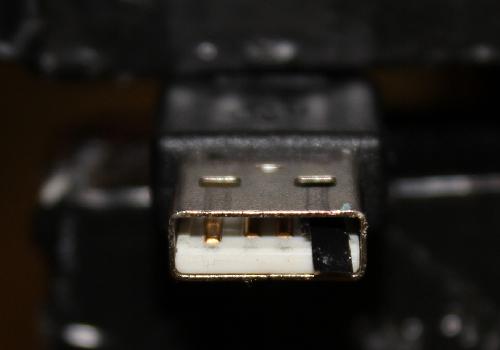
A good quality power supply is essential! save yourself the headache and buy one that specifically says its rating, such as this. A vast majority of SBC issues I’ve encountered are due to power supply weirdness.
A major feature that I wanted is to turn the entire printer on/off from the WebUI. This is easily done with a relay like this one. I have my SBC on the ‘always on’ outlet, then my printer & lamp on the ’normally off’ outlets. It’s also very easy to create your own header to attach to the SBC GPIO pins, such as this. (No soldering required!)
More SBC Gotcha’s
Now as far as software installation, I’ve tried multiple popular Octoprint install methods, and by far the best option is to just use the RPI imager tool, install Octoprint to a high quality SD card, and go from there. Docker is an option, but for this application, it’s easiest to use bare-metal. For SD cards, make sure to buy something as per this excellent article.
Configuring Octoprint
Now that we have Octoprint, we can configure it. Octoprint, like many pieces of good software, has a robust plugin system enabling most of the fancy functionality we want. The default setup for Octoprint is very basic, so here are two lists of plugins: 1 for any printer, and another that has some plugins specific to the Creality printers.
Download Plugins & Download Creality Temp Fix Plugins
Plus, since we’re running a simple linux based machine, we can use the following scripts to install all the packages we want, then setup NAS backups just like any other machine in my homelab.
sudo apt install -y zip git htop software-properties-common apt-transport-https wget xclip net-tools curl python3 python3-pip nodejs npm ca-certificates gnupg &&
  sudo apt update -y &&
  sudo apt upgrade -y &&
  sudo apt --fix-broken install -fy &&
  sudo apt autoremove -y
  sudo apt install -y cockpit cockpit-pcp nfs-common rsync cron
nas_name=maccy # user configurable
nas_path=/mnt/sandisk # user configurable

nas_hostname="$nas_name.local"
ssh_dir_path=/home/$USER/.ssh/
ssh_key_name=homelab
ssh_key_path="$ssh_dir_path$ssh_key_name"

sudo mkdir -p &&
  ssh-keygen -t rsa -C "homelab auth" -f $ssh_key_path &&
  eval "$(ssh-agent -s)" &&
  ssh-add ~/.ssh/homelab &&
  ssh-copy-id -i $ssh_key_path $USER@$nas_hostname &&
  crontab -l > cron-nas-backup &&
  echo "0 0 * * * rsync --mkpath --delete -ravh /home/$USER/.octoprint/data/backup $USER@$nas_hostname:$nas_path/$hostname" >> cron-nas-backup &&
  crontab cron-nas-backup &&
  rm cron-nas-backup
And with Octoprint configured, we can setup PrusaSlicer with some useful defaults and send our processed g-code directly to Octoprint, giving us fully remote control. I recommend PrusaSlicer because it has a vast array of settings, as well as incredibly good documentation.

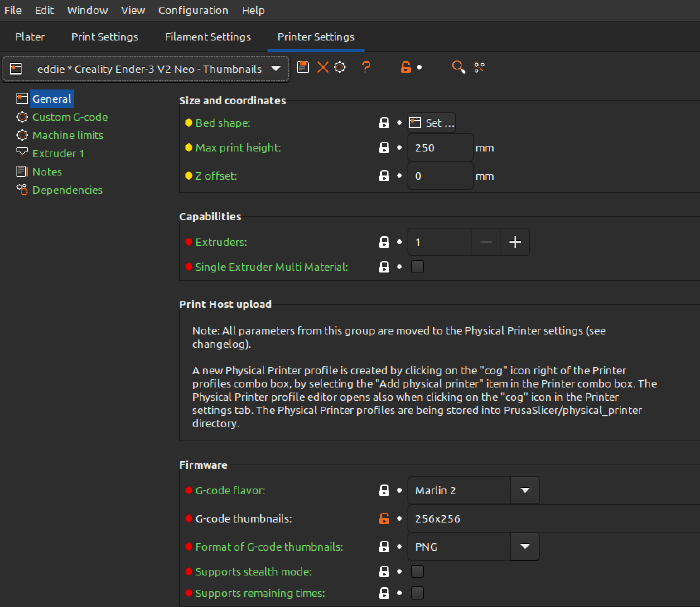
And here is how we send files to Octoprint, no more SD cards required.
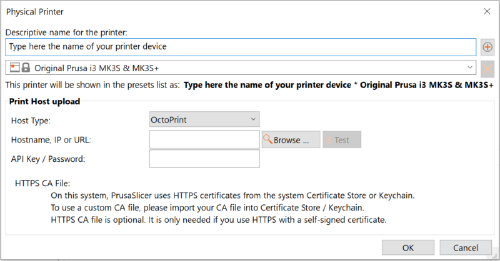
Level 3: Advanced Modifications
Level 1 & 2 are requirements, as far as I’m concerned. Again, my printer is physically slow, so we have to compensate by making everything else as seamless as possible. The next few changes are more advanced, and not directly necessary at the start.
- Relocating the power supply to an external location, often a requirement for the next modification.
- Creating an enclosure to house the printer, such as the LACK enclosure.
- Adding a dry box to help print hydroscopic filaments, such as this or this.
- Adding humidity & temperature sensors.
- AI print failure detection, such as Obico or OctoAnywhere. I plan to cover my deployment of Obico on my personal homelab, as it is fairly easy to setup, but that is another post.
Conclusion
That covers the majority of the trial & error I’ve gone through during the past 6 or so months getting my beloved 3d printer to behave like a tool, not just a fun gimmicky hobby anymore!
P.S. Here is a great guide on how to diagnose easy print issues
Note on Links
None of these links are sponsored in any way, and I selected these arbitrarily based on convenience.
workflow backups raspberry pi 3d-printing dev ops
1a3f29b @ Nov 27, 2024